
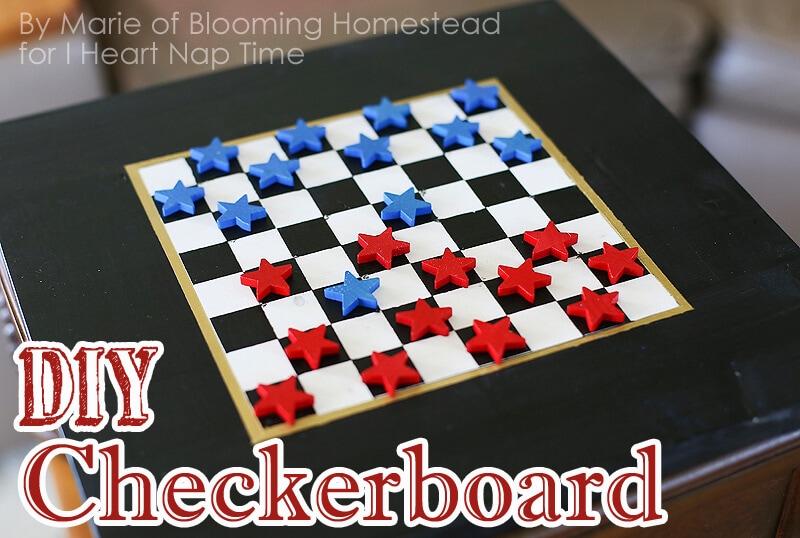
DIY Checkerboard Game
By Marie of Blooming Homestead for I Heart Nap Time.
Happy Summer Everyone! I hope you are enjoying the lovely weather as much as I am. Today I am sharing this DIY Checkerboard Game with a patriotic twist. We love hanging out indoors and outdoors during these warm summer months and playing games is always a favorite activity. There’s nothing like sitting on the porch enjoying the weather and a good game of checkers!
SUPPLIES:
- Wood base cut into a square (mine was 13.5″x13.5″)
- Paint for checkerboard (I used a white wash for the base, and then went over the squares and edges with chalkboard paint)
- Checker pieces- I used wood stars at the craft store that I painted blue and red. You can use buttons, coins, really anything!
- Painters tape: Choose the size you want your squares to be (I used .94″ frog tape so that was the size of my squares)
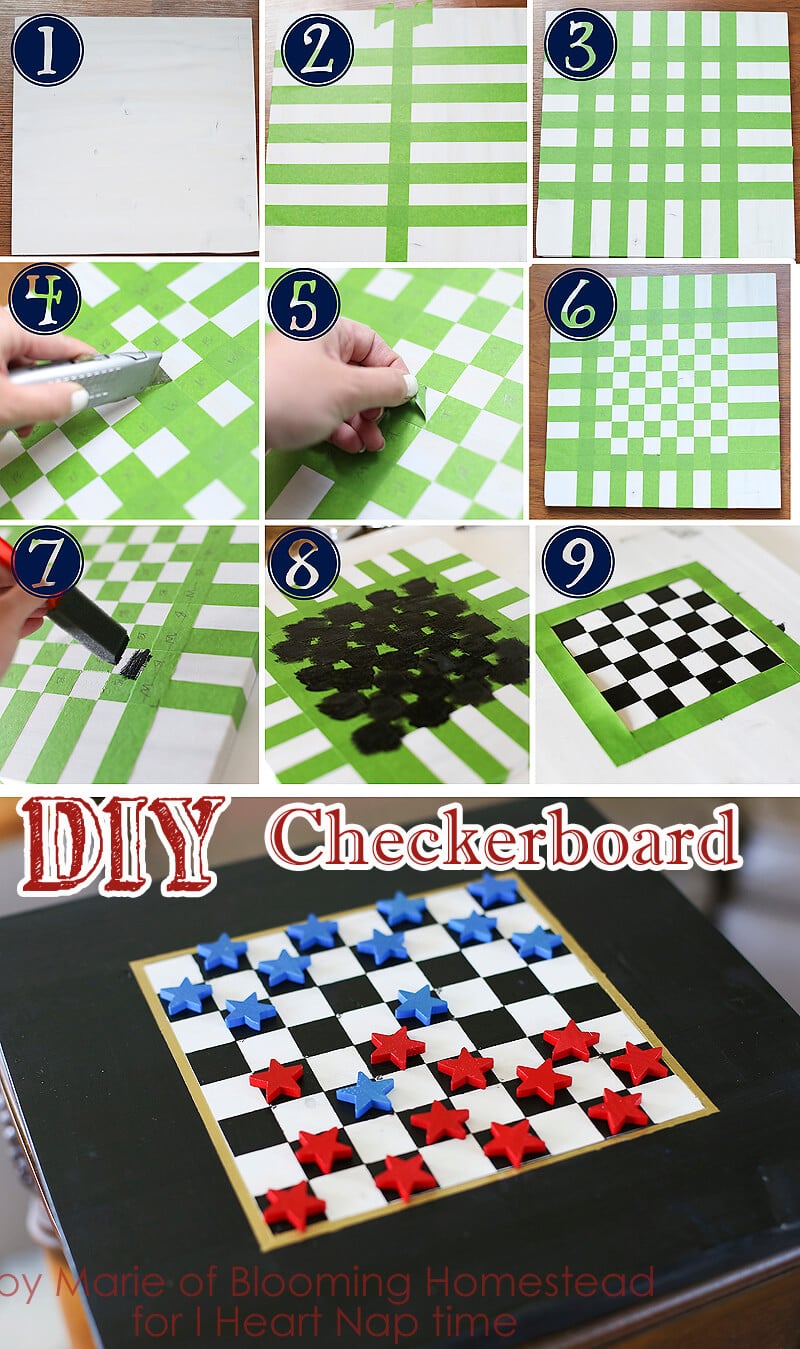
Here is a step by step tutorial of how to easily paint your checkerboard. First you need to determine what size of checkerboard you want, including the edges. I wanted a wide border around the board to be covered in chalk paint for scoring with chalk. 🙂 The typical checkboard has 64 squares, so you’ll want to measure it out to be rows of 8 squares by 8 squares.
- First, you’ll select you board, cut it to determined size, and sand it down. Next you’ll want to paint your board one of the colors of your squares. I wanted a whitewash so I painted that on and let it dry for a day to make sure the paint wouldn’t peel it up or have trouble adhering.
- Now you’ll start taping off your squares. Remember, you want it to be 8 squares x 8 squares. To start, you can find the middle of your board and start placing your tape.
- Keep adding the tape both horizontally and vertically. I used a scrap of tape at the top and bottoms on each side of the placed tape as a size guide to know where to place my next strip. Once you have all your “square” areas taped off you’ll start removing some of the tape.
- To make sure you get those crisp squares, you’ll want to use an exacto knife to gently remove sections of tape to make the squares in the checkboard pattern.
- Gently peel up cut squares. (I labeled my tape squares B for black and W for white so I would know which pieces to remove. (I ended up doing this backwards but it still worked)
- Next, you’ll add any additional tape you need to keep your edges crisp while painting.
- Now you’re ready to paint. Gently dab the paint in the open squares with a minimum of paint to prevent bleeding.
- You may need 2 coats, when the last coat is applied you can remove the tape. Let the paint dry completely.
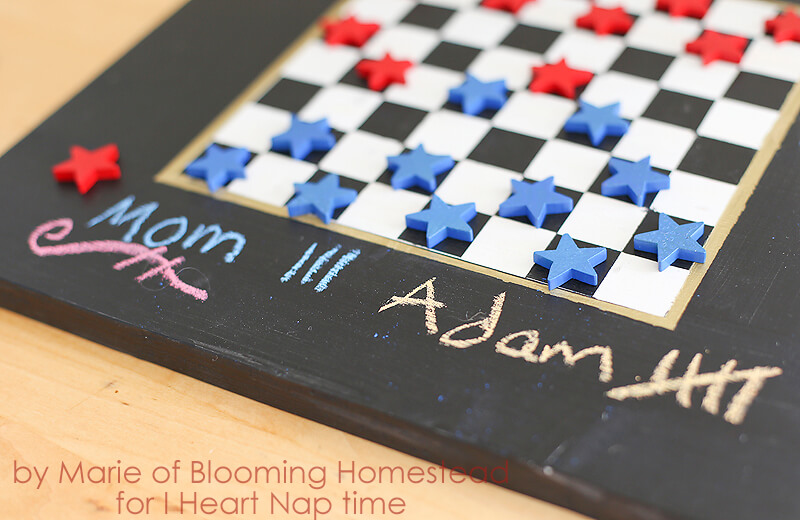
- Now you can tape off your board and paint your edges. I also let that dry and then taped off an inner border that I painted with gold paint, but that is completely optional! Now your checkerboard is ready to go!
I love the chalk paint border, it adds an extra touch of fun to the game. Time to play!
If you’re looking for more DIY projects, you’ll love these:


Love love love this!!! So adorable! Looks like fun to make, I’m gonna have to try it, I love projects like this!!!
I love this, I think I’ll make mine dark blue and white, with red around the outside just to keep the patriotic vibe going! Thanks for the simple and totally “doable” project.
That will be darling! Great idea Jeanette!
Love this! The theme, chalkboard paint and the gold edge all make this the perfect game to have for the family this summer! Think I feel a weekend project coming up! Thanks for sharing!
I am loving seeing all the DIY games! I love your imagination. What about a DIY twister? or a DIY deck of cards game? There are so many games out there… it must be so fun to think about how they can all be made super cute!
I agree, there are so many fun games that you could remake! I love the holiday twists too. 🙂