
How To Make Tissue Paper Flowers
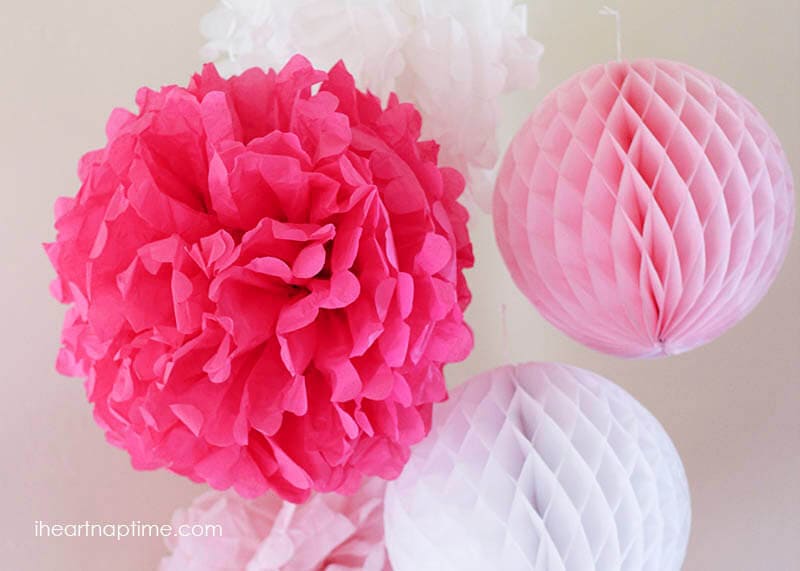
These tissue paper flowers are easy to make, inexpensive and are the perfect way to dress up any party.
These DIY tissue paper flowers are a great way to dress up any party! There are so many colors to choose from. You can customize the look for any party. The best part is you can make them for under $1.
Easy Tissue Paper Flowers
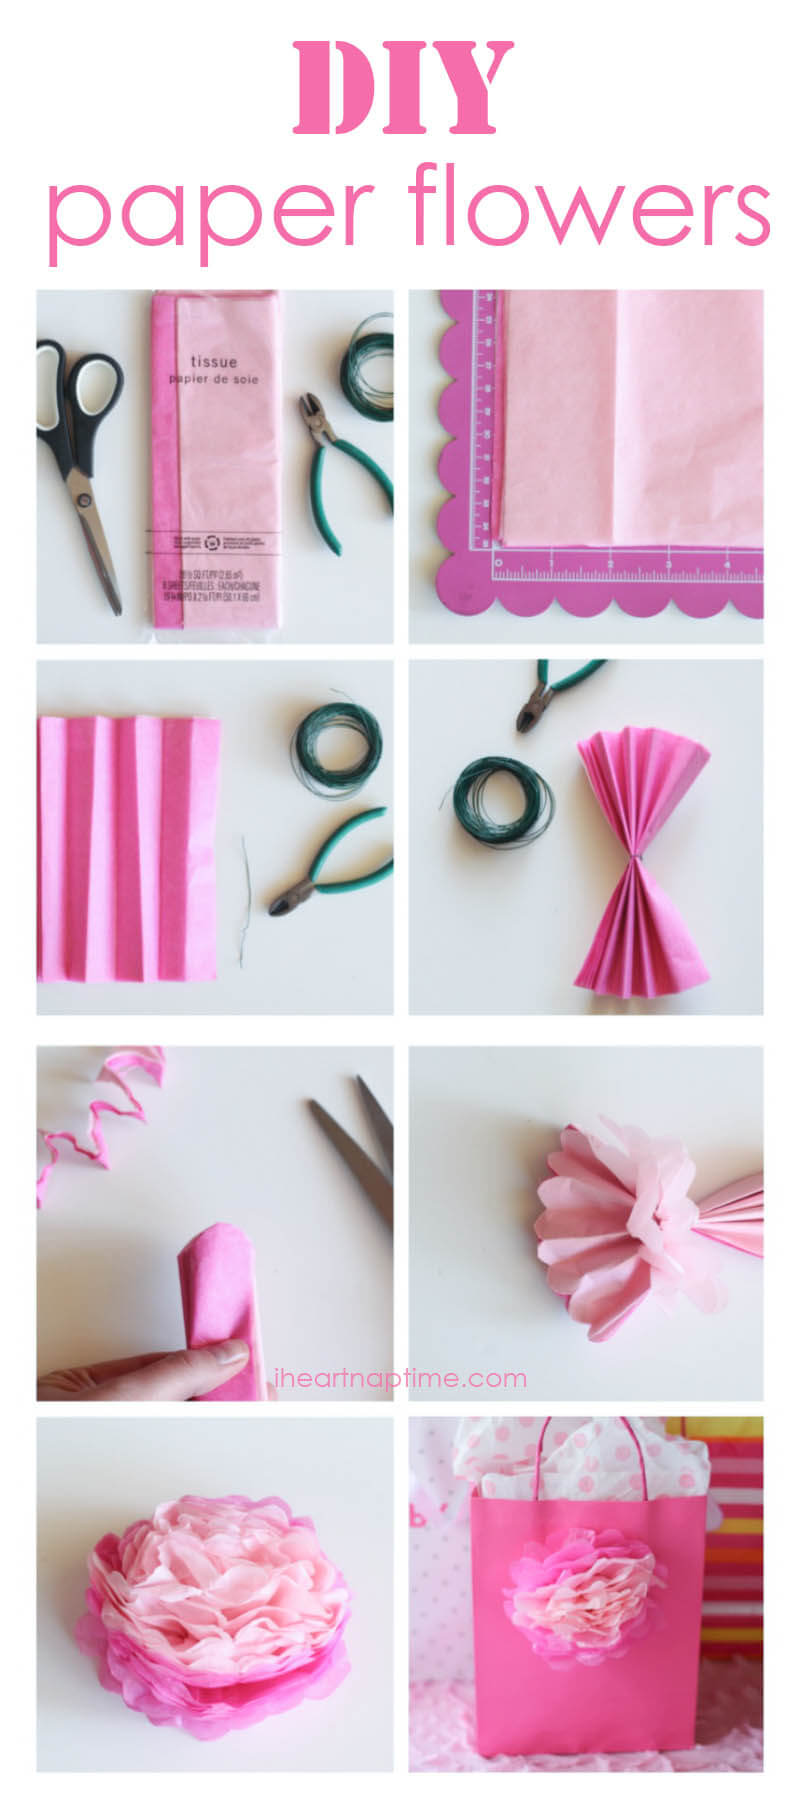
You just need a few simple supplies to get started.
Supplies:
- 1 pack of tissue paper (with 8 sheets)
- Paper scissors
- Floral wire + floral scissors
Instructions:
- If you’d like LARGE pom flowers to hang like the ones above there is no need to cut your tissue paper. If you’d like smaller ones, you can fold the stack of tissue paper in half and then cut an 8×8 square (so there are 16 layers of 8×8 squares).
- Next fold the tissue paper in accordion style (about 1 inch for each fold).
- Then cut a small piece of floral wire and wrapped it around the center of the paper.
- Lastly, cut a round tip on each end of the tissue paper. Then pull each layer of tissue paper out to create the flower. Fluff as needed.
I wanted my flowers really full, so I used 16 layers, but you could certainly use less. To determine how big to cut your flower just divide it in half. So for example my 8 inch squares created about 4 inch flowers.
How do you hang tissue paper pom poms?
The easiest way to hang them is to buy 3M clear command hooks . Then all you’ll do is stick the hook on the ceiling and tie a ribbon or fishing string around the flower and then around the hook.
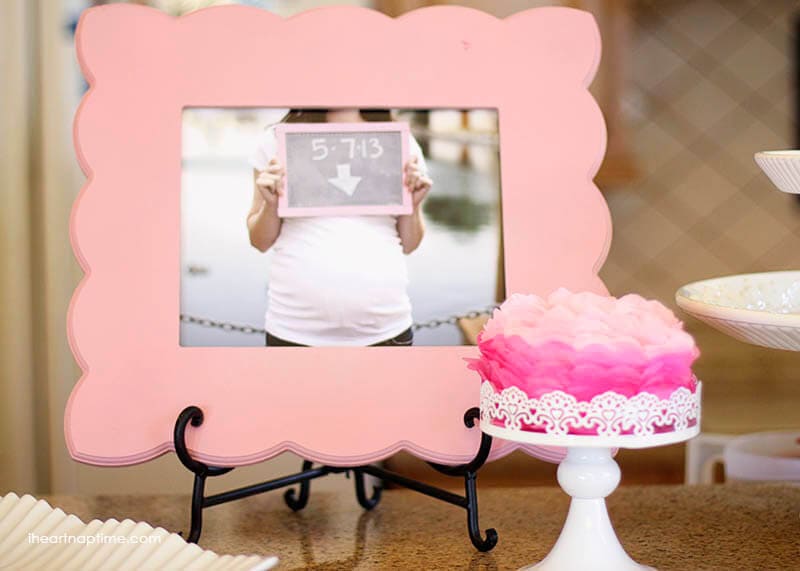
These flowers really are super simple to make and make a great addition to decor. In addition to hanging these paper flowers, you could also stick one on the table I did below… or dress up a cheap bag like the one above.
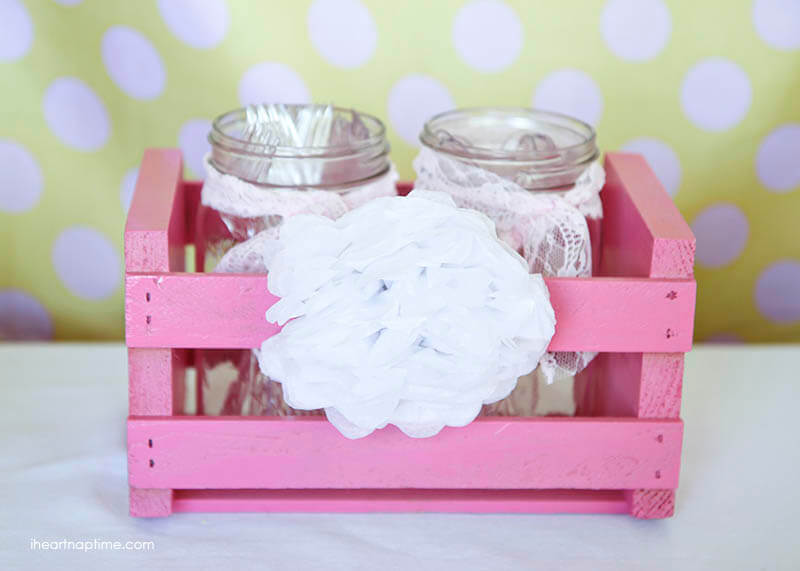
You could also hot glue a flower onto a utensil holder (or really anything).
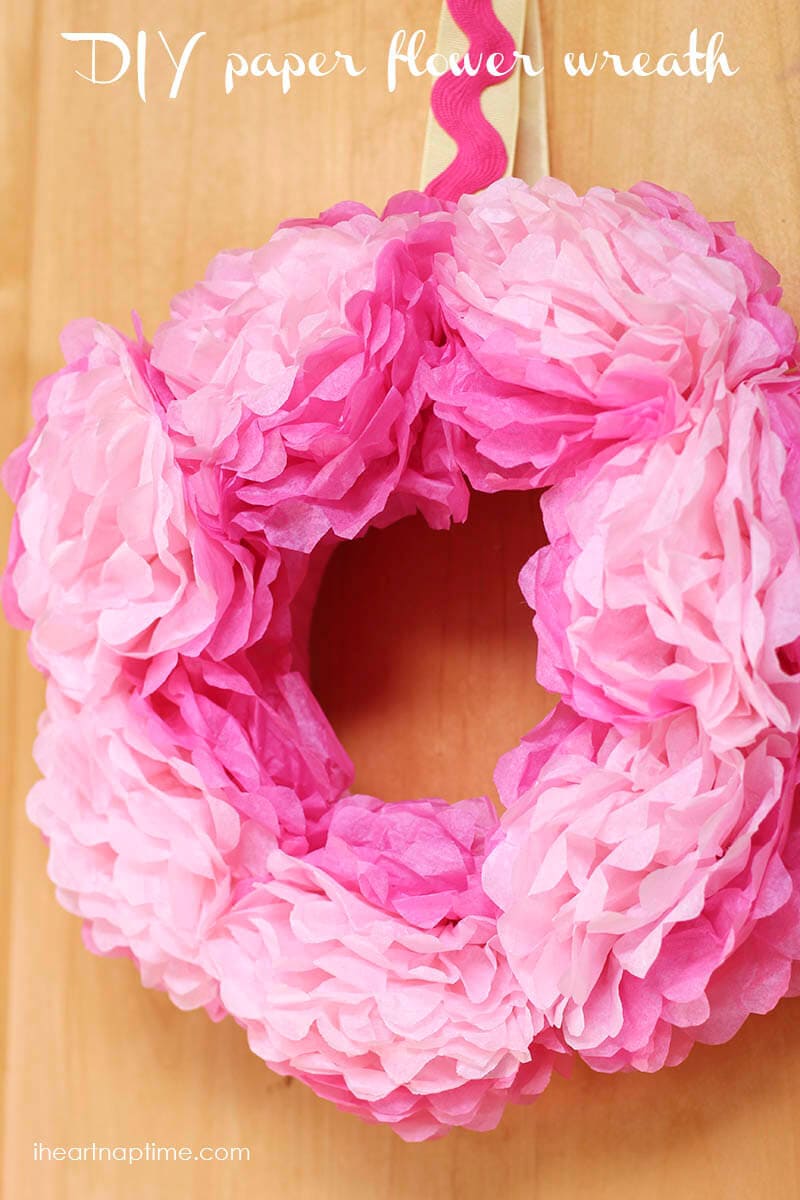
You can also make a fun flower wreath with these flowers. All you need to do is wrap a foam wreath with fabric or ribbon and then hot glue the flowers onto the top of the wreath. Then hang it up on the door with ribbon.
The possibilities are endless! There are so many great uses for these tissue paper flowers. Get creative with colors and sizes.
Yes, I just made some last night for a party! Turns out, I hate to make them because I usually end up ripping the tissue paper. These call for patience, my friend! 🙂 I love the look, though and with just a few of these, you can add a pop of fun color to any gathering!
Lol! I should mention that… patience is key! I tried getting my hubs to help me make them one time and he did not have the patience. I was crafting with my friend when I made these, so it was fun! 😀
My daughter’s 16th birthday party is next month and she wants the whole house decorated for it. This will be so fun to make and hang all over!! Thanks for the tutorial!!
That will be so fun!! 16 is the big one! Go all out! These are definitely a way to do it on the cheap. Have fun! I’d love to see pics!
How could i make a full ball, like the large pom-pom shown? and to fluff them, are you just pulling pack the layers? thanks!
Hi Yael! Just use a full sheet of tissue paper instead of cutting it down. The more layers of tissue paper, the fluffier your ball will be. To fluff them, you pull the layers back carefully.
it is fun to do my class has it
I made my flower and it looks great. a bit big about saucer size. but I love it.
Martha Lofton
I’m glad it turned out well for you!! Thanks for stopping by and commenting! 🙂
Great tutorial, thanks so much! There are several online but yours was especially clear, and I appreciated the tip on calculating the finished size. I’m making these for our granddaughter’s 13th birthday party. Her favorite color is orange, so I’m using orange, hot pink and yellow. They’re really a joy to make! BTW tissue paper at Hobby Lobby was $1 for a pack of 10 sheets (20 x 20).
Thanks for your comment Barbara! They tissue paper flowers really are fun to make! Oooh, great deal at Hobby Lobby. I love that store! 🙂
I’m making these for a bridal shower later this summer. I’m making several in larger sizes because I want to hang them in a cluster from the ceiling over the cake/food table. So far, the two I’ve made look great EXCEPT for where the sides come together. Is there a technique to make those two places look more polished? Thanks for the tutorial!
Hi Amy! I would suggest using sharp scissors to get a good cut and then make sure you fold them really good on the creases! Hope that helps! 🙂
Hi, Thanks for the tutorial, but how did you make it into a wreath? Did you buy those craft wreath? Please explain. Thanks in advance! 🙂
Hi Joyce! All you need to do is wrap a foam wreath with fabric or ribbon and then hot glue the flowers onto the top of the wreath. Then hang it up on the door with ribbon. Easy peasy!
Hi, its great to get a good tutorial on making paper flower. but how did u make the sharp globe-like looking flower on the pics?? its too nice. please tell me the procedure ! thnkx !
We really appreciate all of your hard work and effort.
Wow! Tanx for this tips, i would take clues for my blog.
Great pin
Hello
I’ve just found your website and love this simple way to make beautiful tissue paper flowers. I’m definitely going to make these.
They would make very effective (and inexpensive) decorations for the ends of church pews at a wedding don’t you think?
I’m delighted to have found this site! Thank you
Moira
Great paper flower tutorial! Never seen a wreath like that before going to try it!
Thank you! It was the perfect decoration for a baby shower. 🙂