
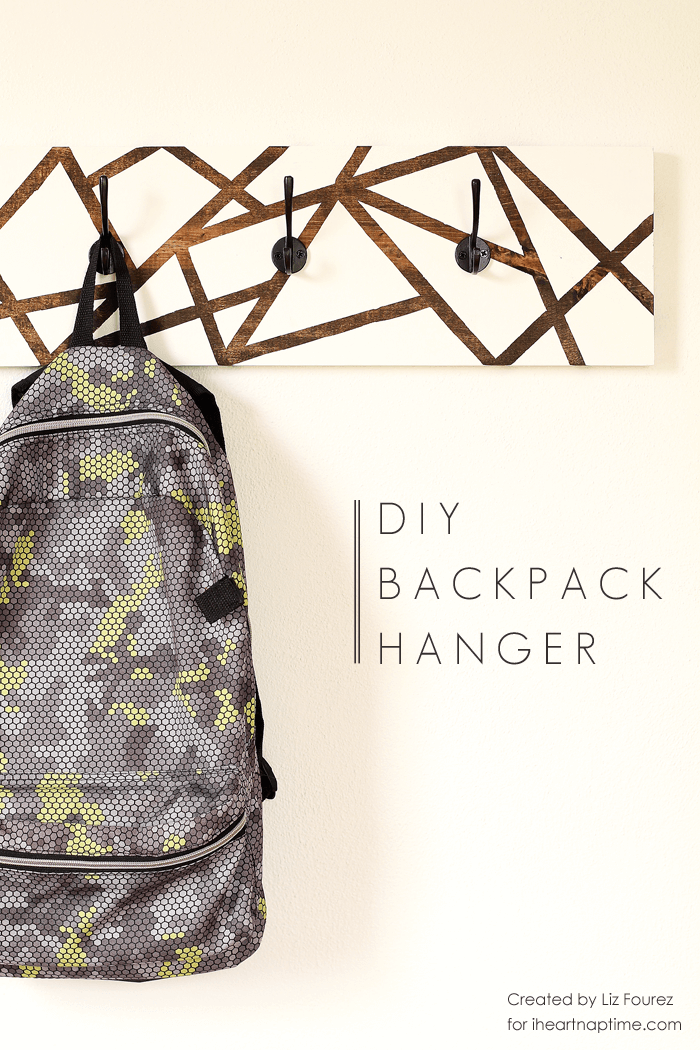
DIY Backpack Hanger
Learn how to make this DIY backpack hanger to help get organized for back to school! Follow these step-by-step instructions and photo tutorial to get started.
Hi again, friends! Can you believe back to school is already right around the corner?? Where on Earth did this summer go?
I’ve spent some time this week getting organized for our back to school routine, and one of the top things on my to-do list was finding a designated spot for my kid’s backpacks to go when they get home from school.
Somehow they always seem to end up left on the floor, on the kitchen table, or lost somewhere in a messy bedroom, so I wanted a simple set of hangers that would hold their bags, coats, sports stuff, and anything else they need. This gorgeous, two-tone backpack hanger is what I came up with!
I find that when it comes to kids and organization, the simpler… the better. This little DIY hanger gives them the perfect place to drop off their bags and coats after school and is easy enough for little hands to handle. And the best part? It really is super simple to make!
Supplies
- Wood board: Mine was a scrap piece of 1×8 board cut to 24″ long
- Stain: I used Minwax dark walnut
- Paint: I used Valspar Du Jour
- Painter’s tape: Choose the level of width that you like
- Paint brushes: I used two paint brushes
- Coat hooks/hangers and screws: You can find these at Home Depot, Walmart, etc.
Instructions
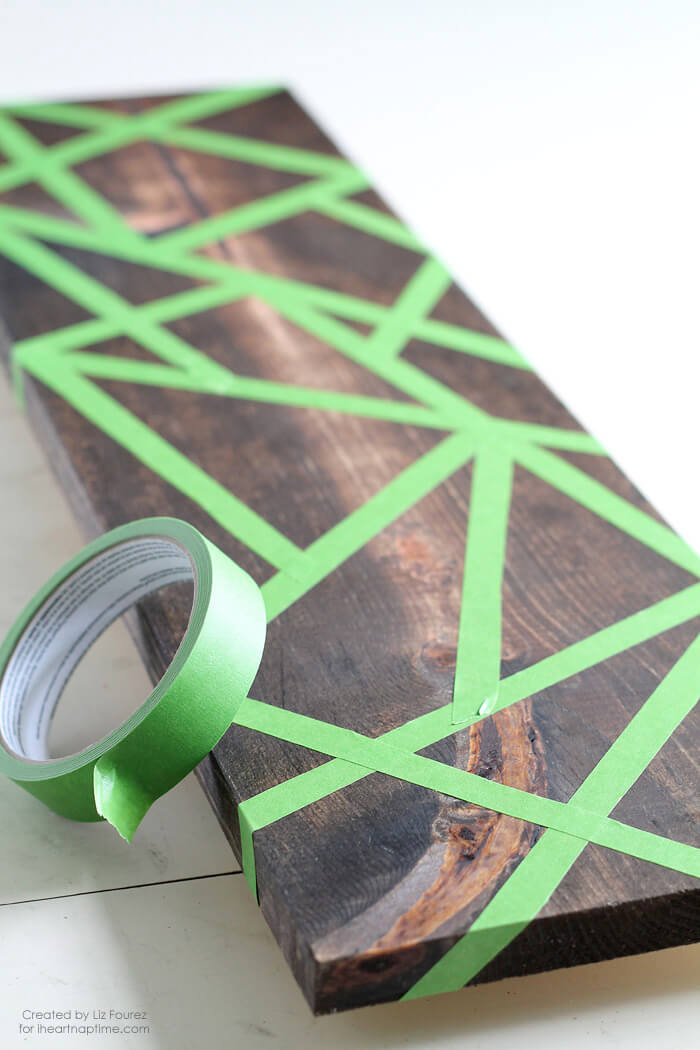
Stain. Apply the stain to your board and allow to dry for 1-2 hours. (Don’t worry about the back, it won’t be seen!) Add strips of painter’s tape across your board running in different directions to create geometric shapes in random sizes. No need to plan it out or be precise, just start adding tape randomly until you’re happy with the look! I love no-skill-required projects like this! 😉
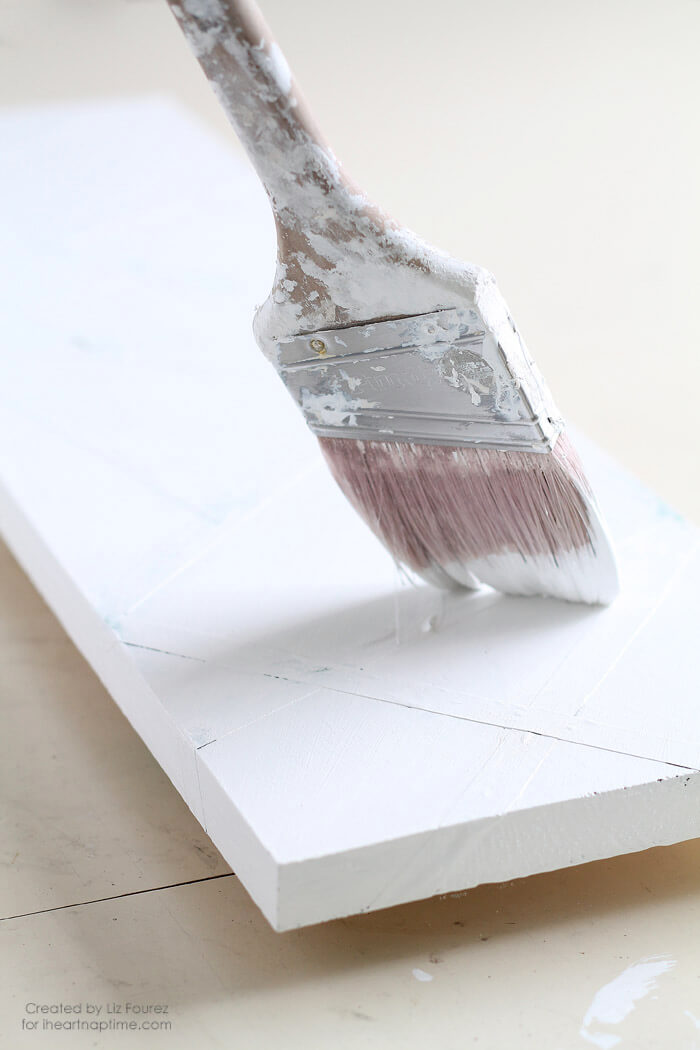
Paint. Make sure the tape is sealed really well against the board and add your second coat of paint on top. I used two coats of white paint on mine. I painted the first coat on, waited about 10 minutes for it to dry slightly, then painted on the second coat.
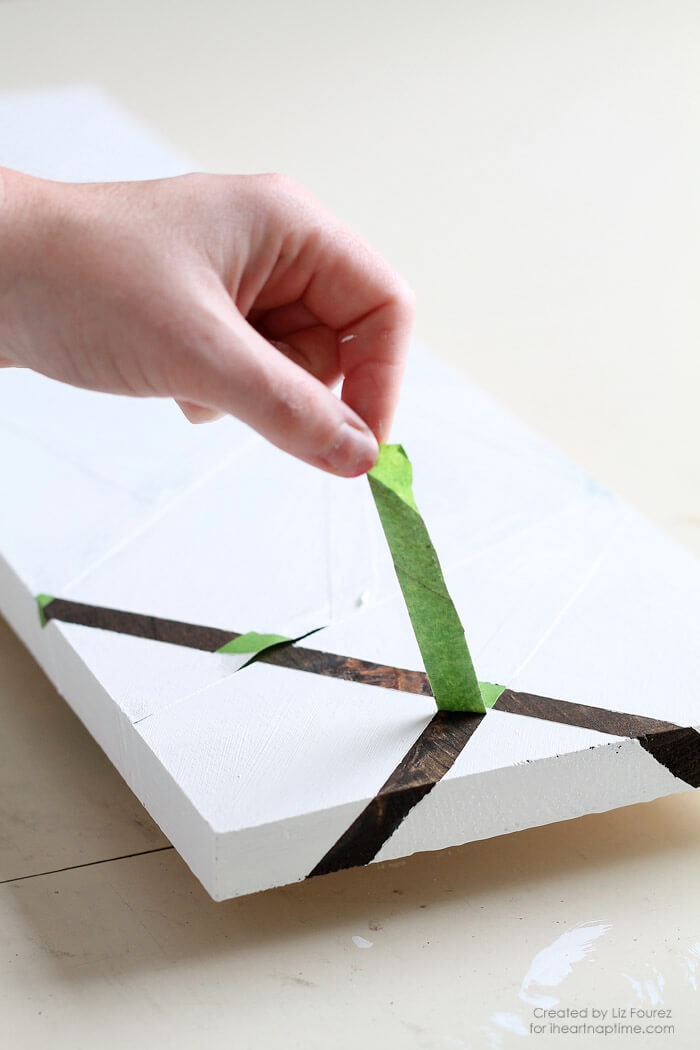
Peel. As soon as you finish the last coat, carefully peel off the tape, exposing the lines of gorgeous wood grain running across the board. It’s better to peel the tape off while the paint is still wet so you have less chance of peeling the paint off along with it.
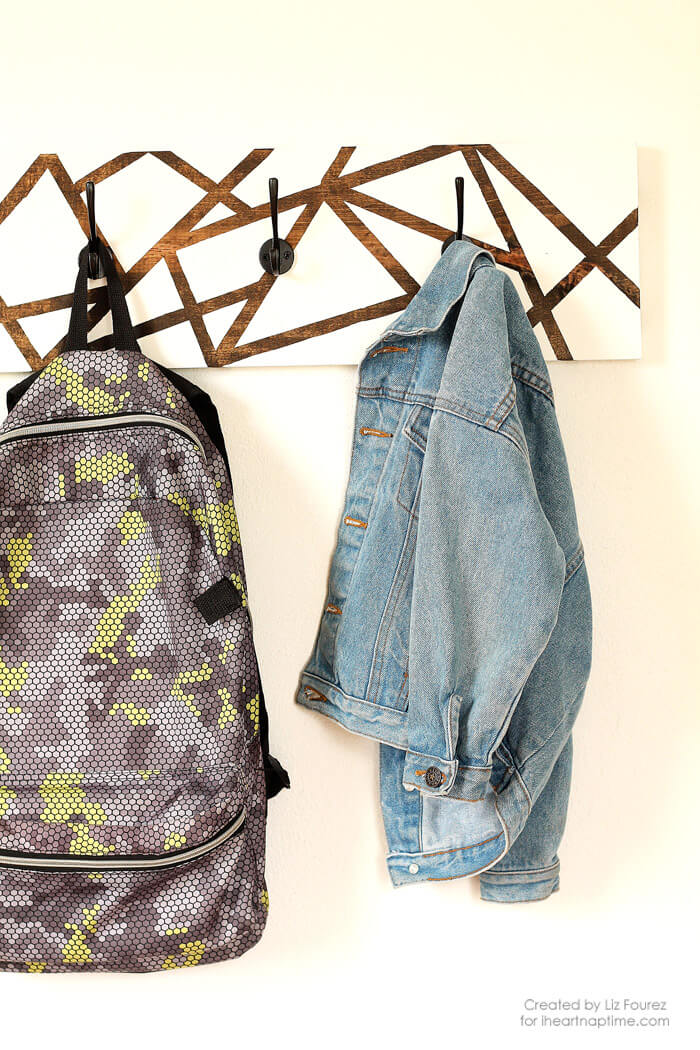
Add hangers. After the paint is finished drying, it’s time to add the hangers. You can use any sort of hook, hanger, or knob you like. Just space them out evenly on your board and screw them in place.
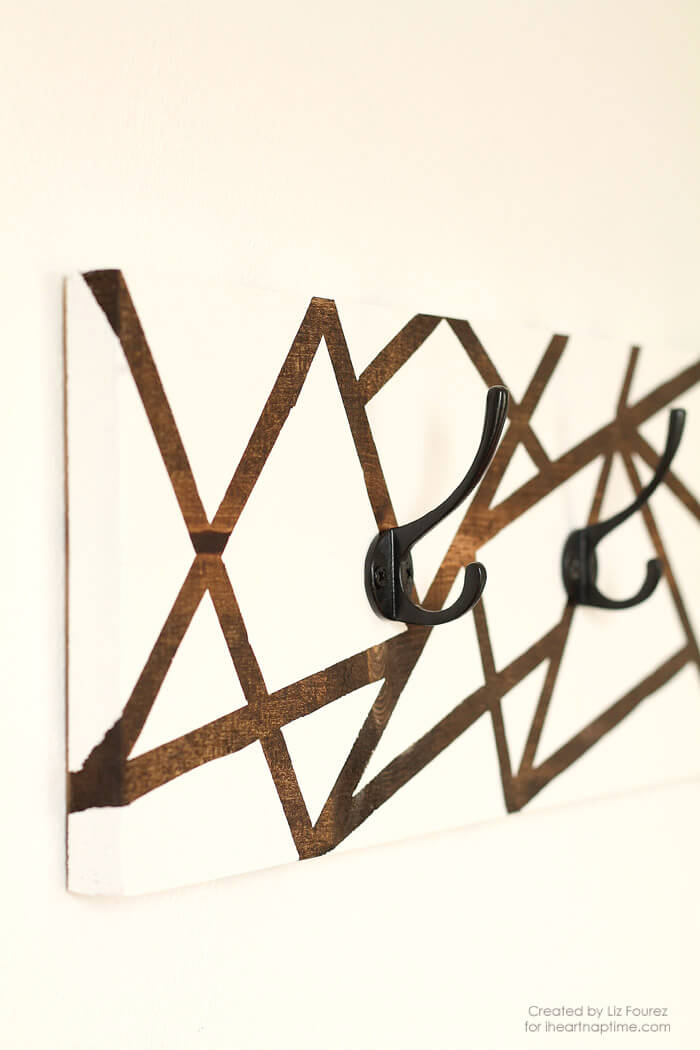
Our new backpack hanger has been hung in the playroom and already has backpacks set up anxiously awaiting the first day of school. I’m completely smitten with the contrast of bright white paint against the hard lines of dark wood grain peeking through, and the simple black hooks look clean and modern. It’s a great piece of functional art on the wall, and this momma is happy to have no more backpacks laying all over the floor!
More DIY home projects:
So what do YOU think? What colors would you use and where would you hang this in your house?
Originally contributed by Liz Fourez.

question – with it being heavy and holding heavy type objects… what is it hung on the wall with?
I love the two tone with the white and wood! Pinned. 🙂
I think I need to make one of these for my son’s room just to hang random items! Love it! Thanks for the idea!
I love the contrast of white with stained wood. I want to copy this for a towel rack in my girls’ bathroom. It’s fabulous.
Love it! I made one but am also wondering what you hung it on the wall with and how? It holds heavy stuff!
I would like to know how you hung it as well!
very nice idea thanks!