DIY fabric art
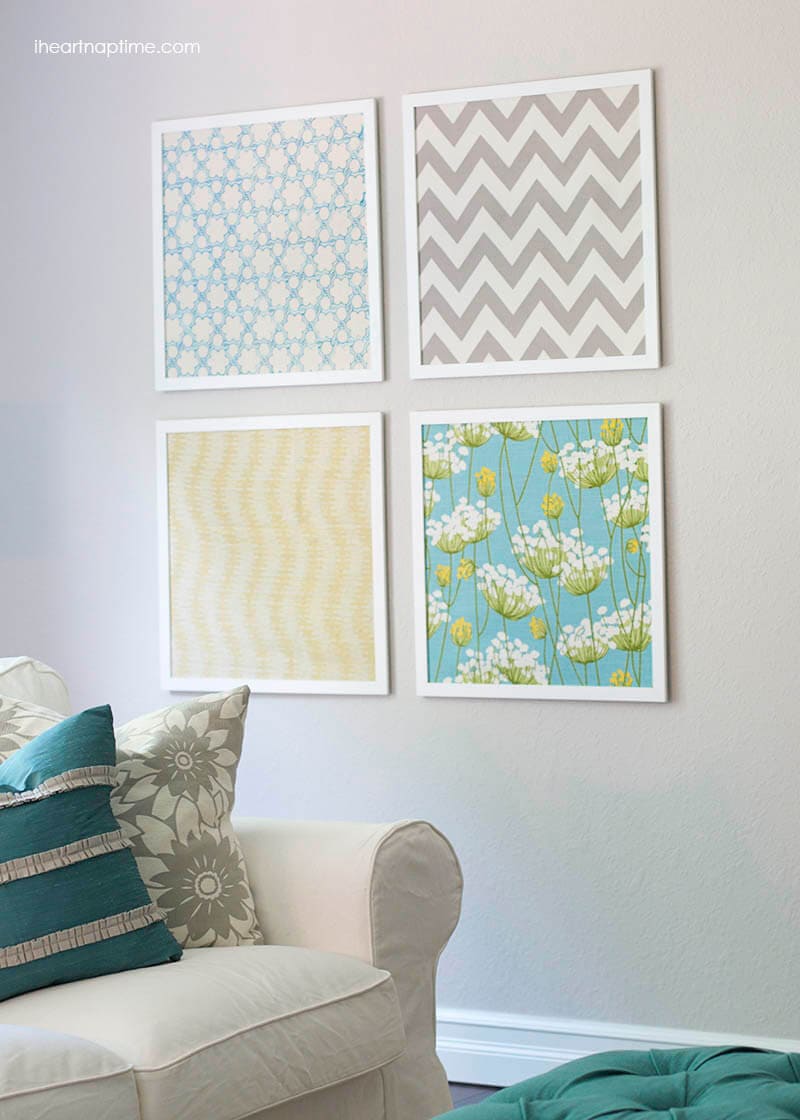
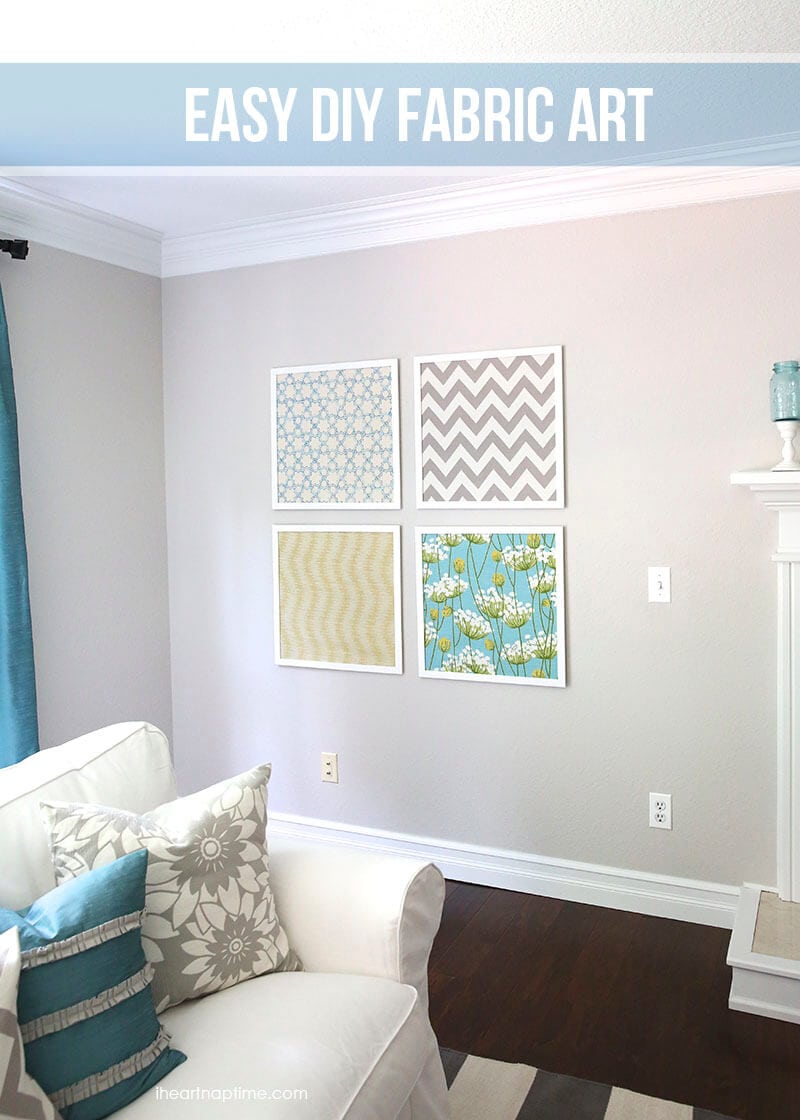
Today I wanted to show you a quick and inexpensive way to dress up your walls with DIY fabric art. I love the look and they are so easy to create! There are so many choices of fabric out there… the possibilities are endless! Here’s how I made my fabric art.
DIY fabric art
Supplies needed:
- Frames (found mine at Ikea)
- Fabric
- Hot Glue
- Hammer and nails or command strips
Instructions:
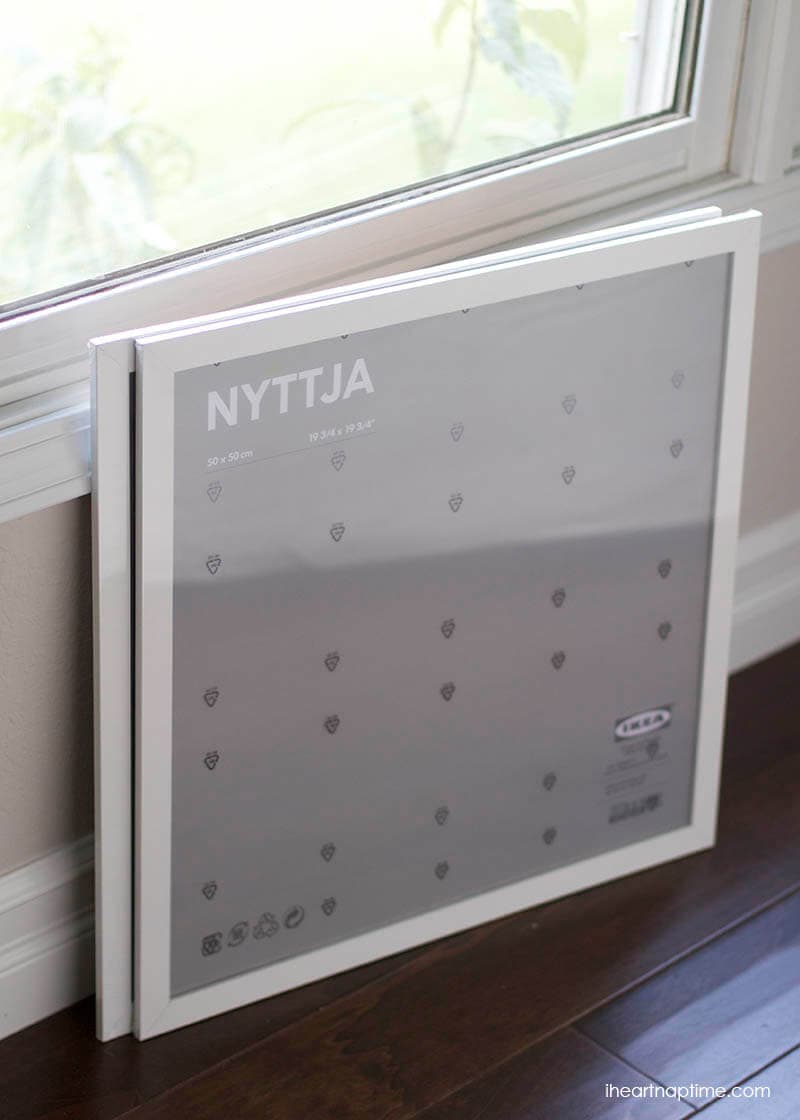
The first thing you’re going to do is determine how big you want your frames. I wanted my frames pretty big, so I picked up four of these white frames from Ikea. I have seen similar ones at Target too.
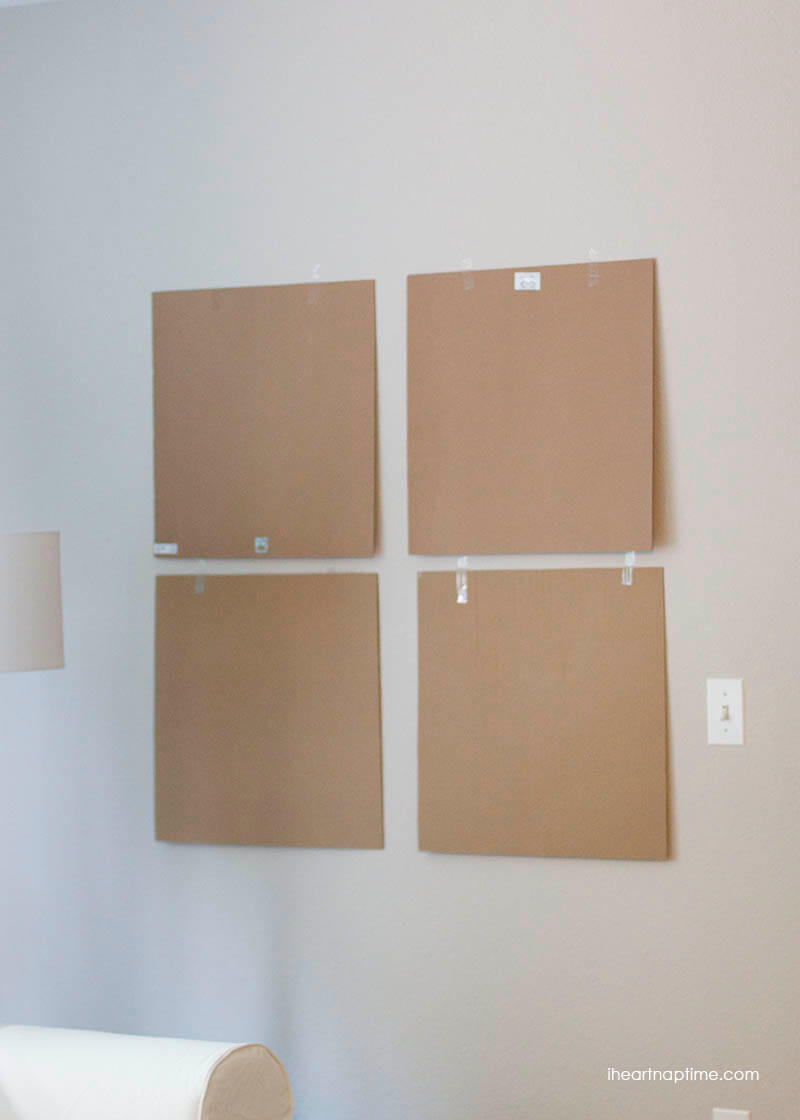
Next I removed the cardboard from the frame and taped them to the wall. This helped me decide where to place the frames on the wall and how far to space them out.
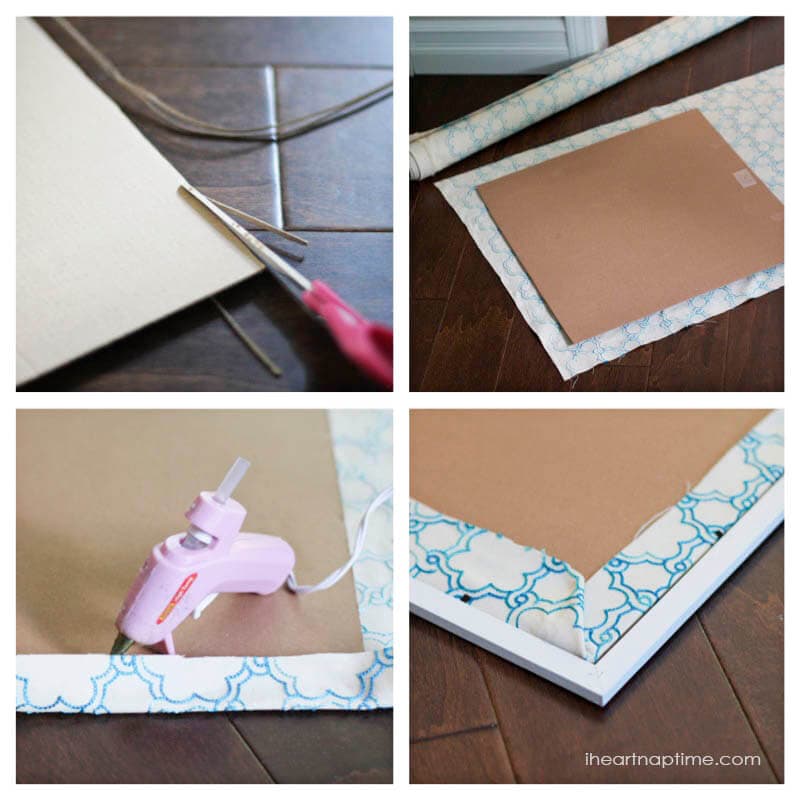
Next I cut 1/8 inch off one edge of the cardboard to allow room for the fabric when placing it back in the frame. Then I cut out a piece of fabric about 2 inches wider than the cardboard. After that I wrapped the cardboard like a present with the fabric, hot gluing as I went and then I placed the piece back in the frame.
After I was finished, I hung up my new fabric art and admired it on my wall. This project took me less than an hour from start to finish. Can’t beat that! The possibilities really are endless with this simple piece of decor. Get creative! 😀

I love this idea. There’s something about the repetition of squares that I really like. Just out of curiosity, do you remember how much the frames cost at IKEA?
(I just realized that the name of the frames is in the picture so I can look it up myself, but if you want to answer the question anyway for the sake of any other curious readers, go ahead….)
Thanks Christine, I love the repetition too! The frames were $7.99 each! 🙂
my Favorite Colors are Teal and Orange with a Chevron pattern, Jamie, I think you are so creative, Im honored to call you my cousin!
love, Jenny
Thanks Jenny, I am so grateful you are my cousin too! Love you! 🙂
Love this idea! I have an emoty wall in my living room but couldnt figure out what to put up – this is perfect!!
So easy and fun! 🙂 Glad you liked it!
Great idea! I’ve been thinking that if I could frame really large pieces of fabric, that this kind of craft would be a great way to dress up my unfnished basement’s walls. If I did this craft for the interior of my home, I would just use Command Hooks to hang my art — I don’t use a hammer and nails anymore! Thanks for posting.
It definitely dressed up my bare walls! Hope it does the same for yours! 🙂
Such a great idea! You could even change them up for holidays! The possibilities are endless!
So true, that is such a great idea! They are so easy to switch out! 🙂
Sorry, at first I couldn’t find where to type my comment. I got it now. lol . I love how this looks. It is beautiful. I love fabric but I don’t really enjoy quilting. This is a great option for me to use pretty fabric that I like.
This definitely is an easy way to display cute fabric! I love the simplicity of it!
I love this idea. What is the names of the fabrics. I really love the bottom teal flower one. Thank you for sharing, this has really given me great ideas to decorate my living room.
Thanks Christina! From left to right, top to bottom…the fabric names are: HGTV Home Boho Lattice Glacier, HGTV Home Chevron Chic Quartz, HGTV Home Wavering Citrine, HGTV Home Fully Laced Turquoise! 🙂
I love the room and the pictures just added the right touch. I did a similar project in my family room using black frames and scrapbook paper. Super easy, inexpensive and scrapbook paper gives you so many great colors and patterns to choose from. I LOVE DIY!!!!
Scrapbook paper would work great too! I love how easy and pretty these frames turn out! 🙂
Love this. I also love the wall color. That’s the color I’m looking for. What is it?
Hi Keri! It is called Agreeable Gray by SW. 🙂
I tried this on a smaller scale for my sister’s room. Looked beautiful in the light.
Simple and beautiful project. Tried this in my sisters room with scrap fabric. Stands out nicely when the sun shines through.
How simple is this, and it’s so cute! Love it 🙂
Hi Jamielyn
I absolutely enjoy reading your blog. Fabric art is simply so chic and elegant, a great idea to adding that personal touch to your own home. What a fantastic DIY tutorial 🙂
Thank you so much for sharing, can’t wait to give it a go! Hope you don’t mind me linking to this post for awesome DIY’s to try this spring. x
Don’t mind at all, thank you! 🙂
How much fabric did you need for each frame?
My frames were just under 20 inches square, so I got 2/3rds a yard (24 inches) and cut a 24-inch square. It really depends on what size frame you decide to get, though. 🙂
This is beautiful! I have looked at it times without number. Pleas Jamielyn, have been trying to order the frames from Ikea but they keep on showing me the already designed frames. Don’t know which exact words I should use to get the plain frames.
Hi! They may not sell these exact frames anymore, but I really like the RIBBA frames as well! 🙂