
Wrapped Christmas Table and Snowman Plates
Wrapped Christmas Table and Snowman Plates… an easy and cute way to decorate your table for the holidays!
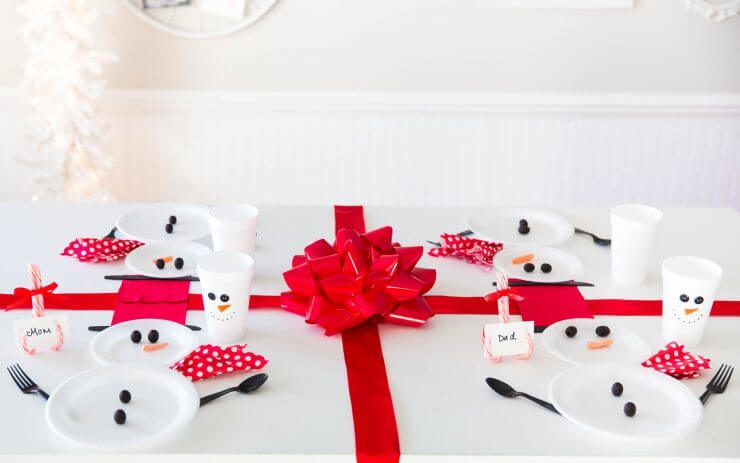
A new tradition I’ve started is having the table decorated on Christmas Eve with a wrapped Christmas table, snowman plates, and cups. We like to keep Christmas Eve semi-casual with paper plates, so we can spend less time doing dishes and more time enjoying the evening with each other. We usually do some type of Mexican dish and then have our nice ham dinner on Christmas day.
This table was SO easy to put together, very inexpensive, and best of all my kids loved it! Once you have your supplies gathered, it will take you 30 minutes, tops!
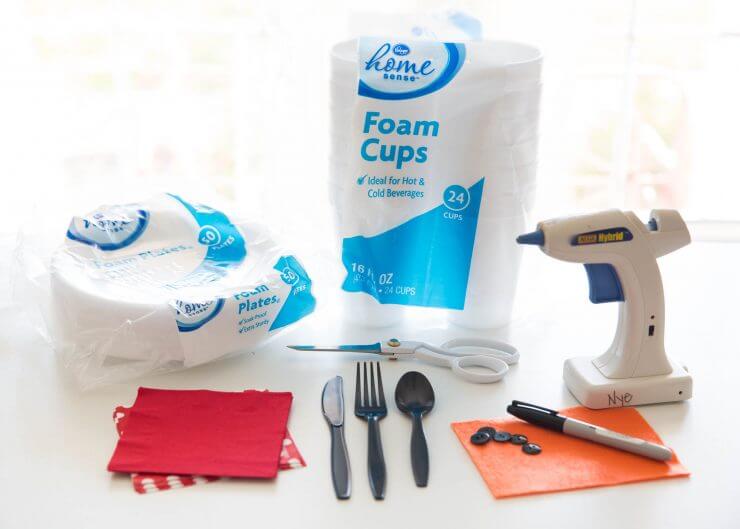
I was doing some late night shopping online at Kroger/ClickList this past week and spotted the foam plates and cups on sale so knew I had to stock up. Once I had everything ordered, I swung by in the morning to pick everything up. Easy peasy! They made crafting these snowman plates super easy and inexpensive!
Supplies for the Christmas Table
Here’s what you’ll need to make the snowman plates and cups:
- Foam plates (regular and dessert)
- Foam cups
- Black or brown utensils
- Red dessert napkins
- Scissors
- Hot glue gun
- Sharpie
- Black buttons
- Orange felt (or maker)
For the table I put a big bow in the center in the middle and then used glue dots to add ribbon strands. You could also use white butcher paper as the base.

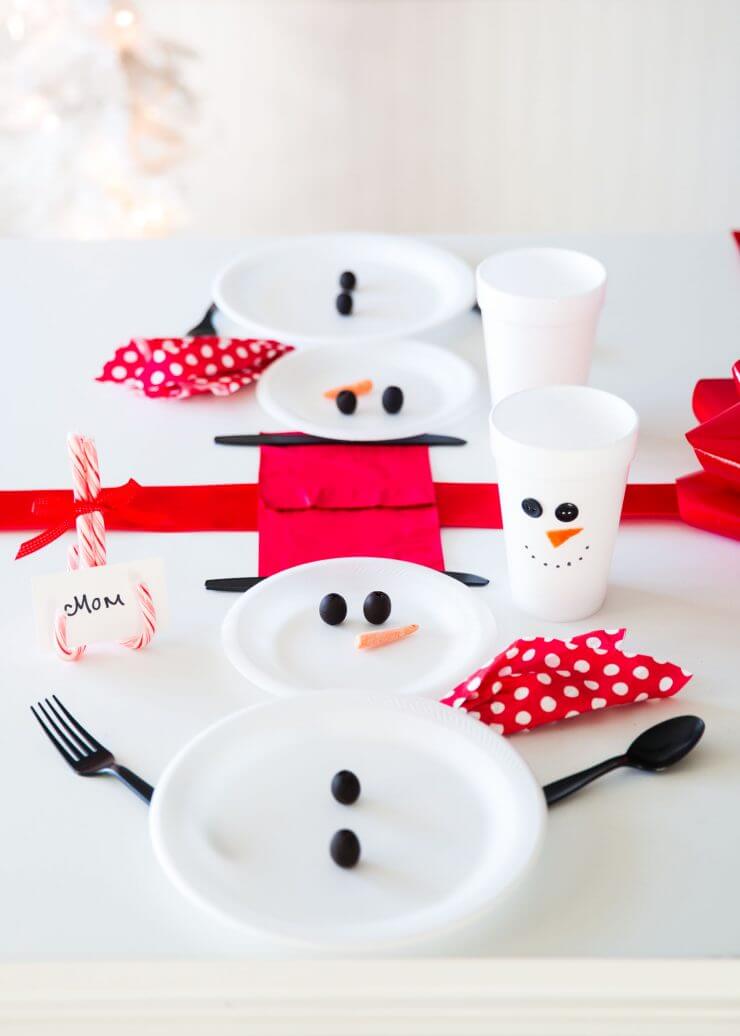
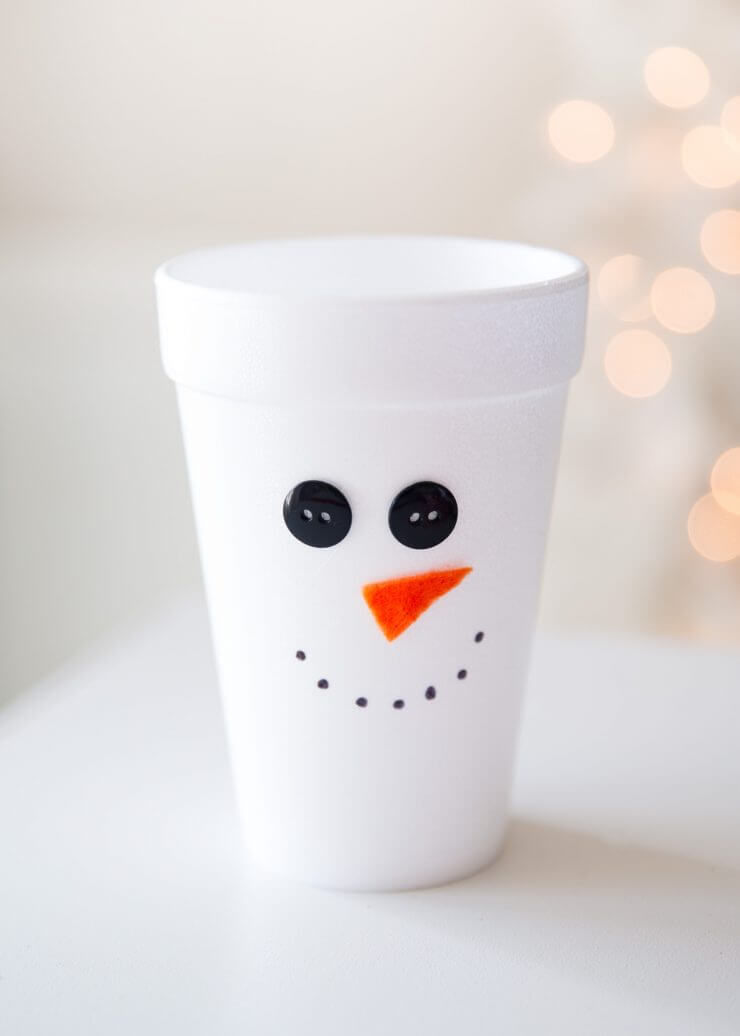
Then for the snowman cups I hot glued the two black buttons on for the eyes. Then I cut a piece of orange felt to create the nose and hot glued that on. For the mouth I used a sharpie and drew on little dots. Super cute and easy!
For the snowman plates, I stacked the dessert plate on top of the dinner plate. Then I put the red napkin on top for the hat and wrapped to the side for the scarf. Then I put the knife at the bottom of the top napkin to create the hat. I also used the fork and spoon to create the arms. Last, I put olives and carrots on the plates to create the button eyes and nose 🙂
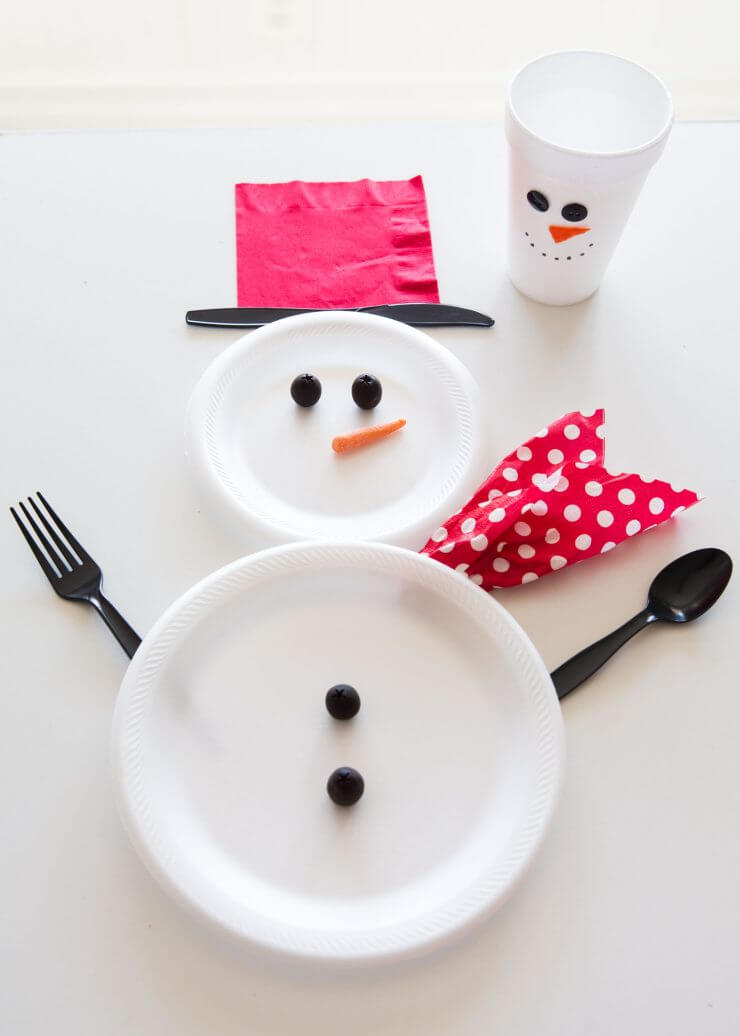
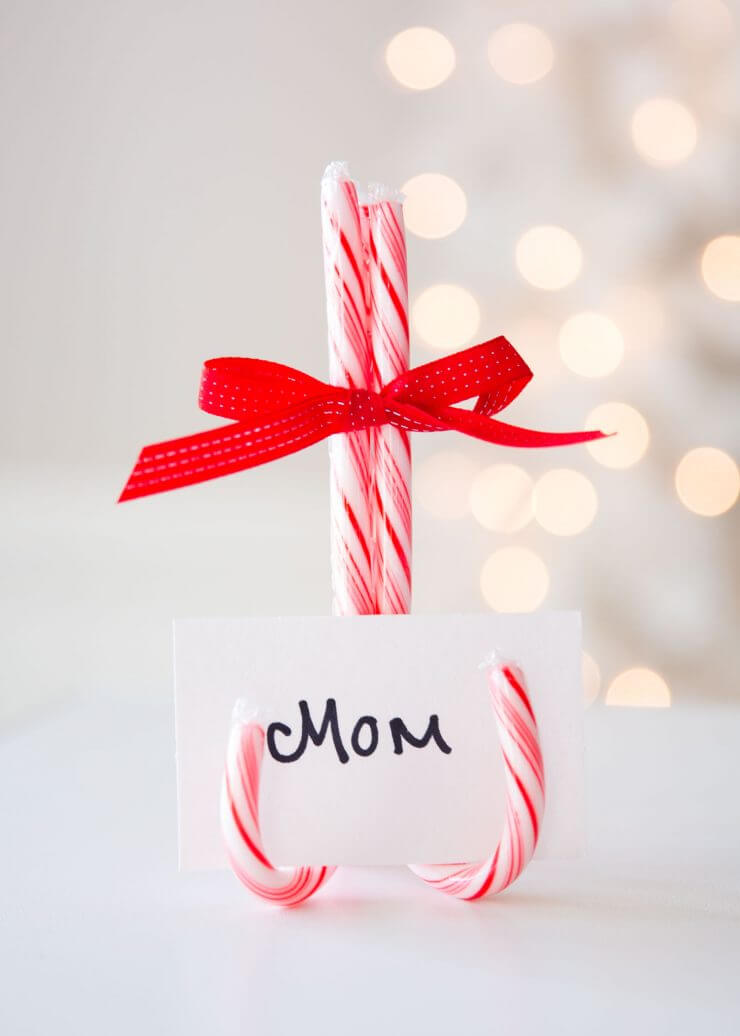
I also made little name place card holder using candy canes. All I did was hot glue 3 candy canes together, tie a ribbon on the top and wrote out the names on a piece of white card stock paper with black sharpies. Super inexpensive way to dress up the table and make it feel more personalized.
Hope you enjoyed this post! Have a wonderful holiday!
Such I cute and fun idea!
Oh my gosh, that is one adorable table! I love the little snowman plates. Those card holders are so cute too!
This is sooo adorable, my kids would have a blast setting this up with me!
These are SO cute and super easy! I see kids decorating the table in the near future.
Oh my gosh! This is the cutest table!
This is just super cute and so creative!! My kids would love it!
What cute decorations! My kids would love these!
Oh my goodness! This is so cute and charming! I love everything about this table setting!