
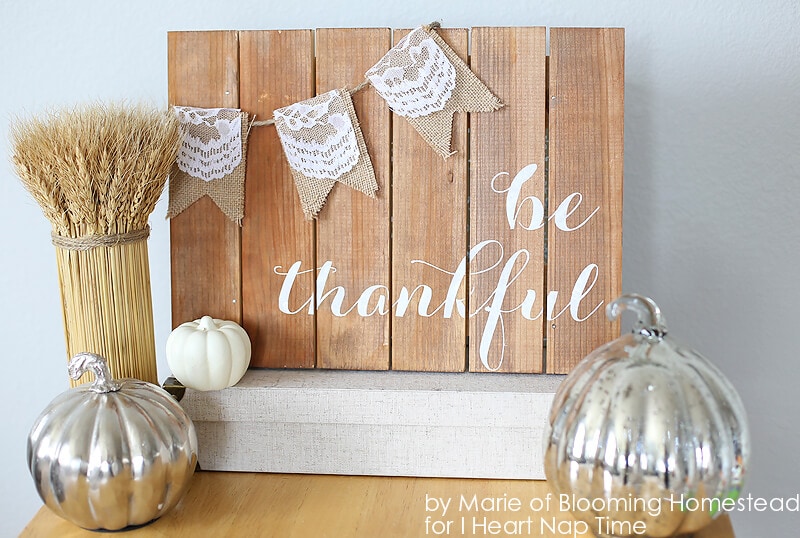
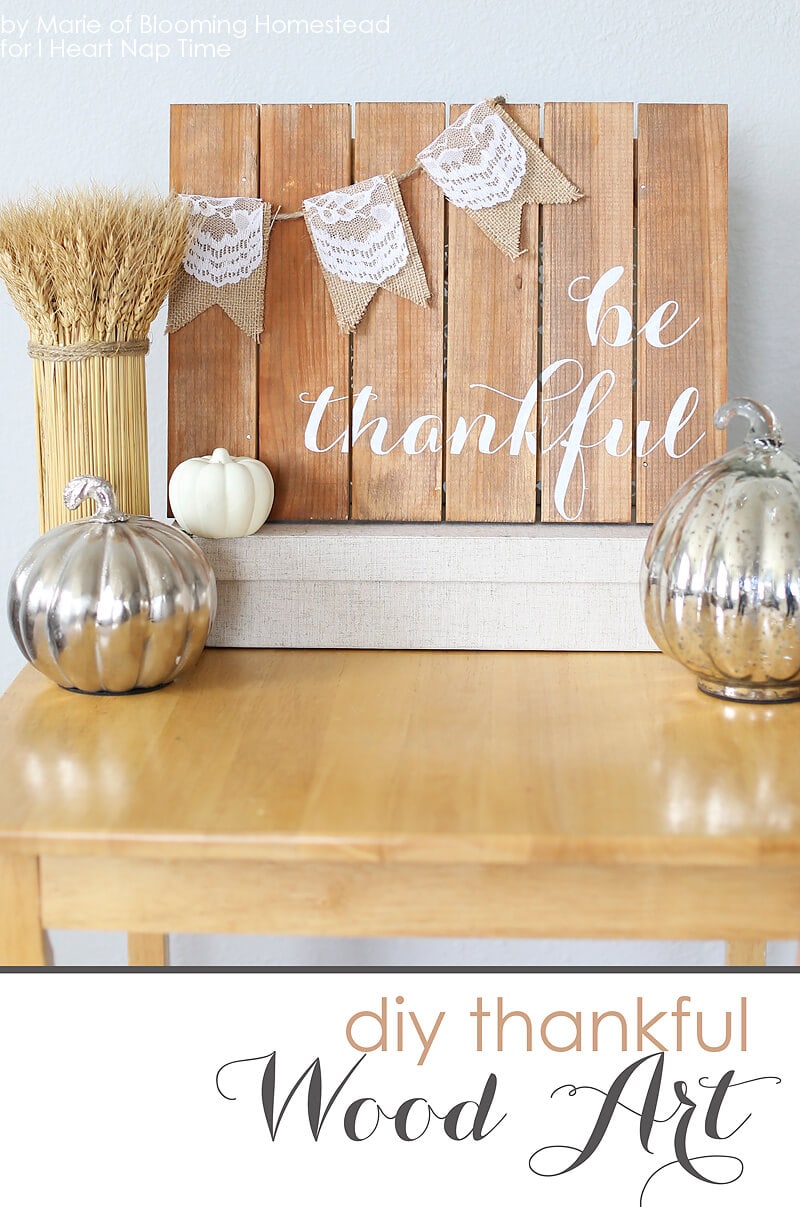
Be Thankful Wood Sign
Be Thankful Wood Sign by Marie of Blooming Homestead for I Heart Nap Time.
Hello friends, today I am sharing a tutorial for this lovely Be Thankful Wood Sign. I love this time of year when we can reflect on all the many wonderful blessings we have and this sign is such a beautiful reminder.
SUPPLIES:
- 1×2 wood strip, cut into 8- 1 foot length
- wood stain
- nails/liquid nails
- cardboard cut into strips as spacers
- burlap cut into pennant shape
- lace
- 2 feet jute
- white paint
- craft cutting machine and self adhesive vinyl
- glue gun & sticks
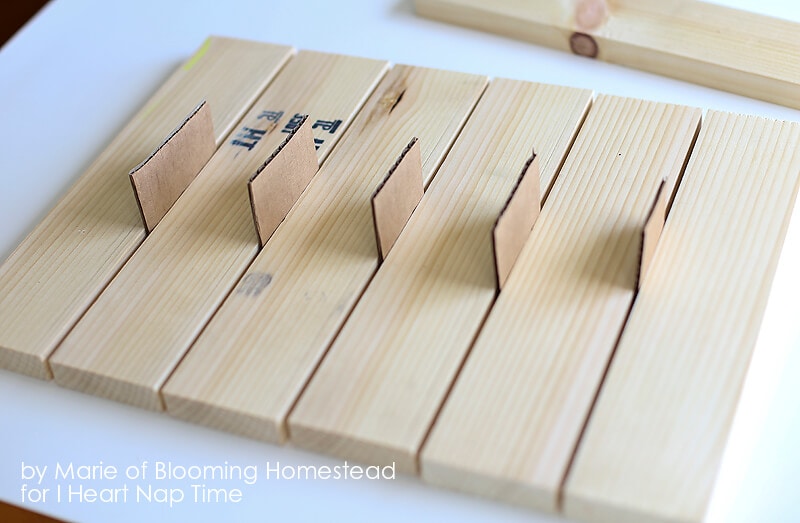
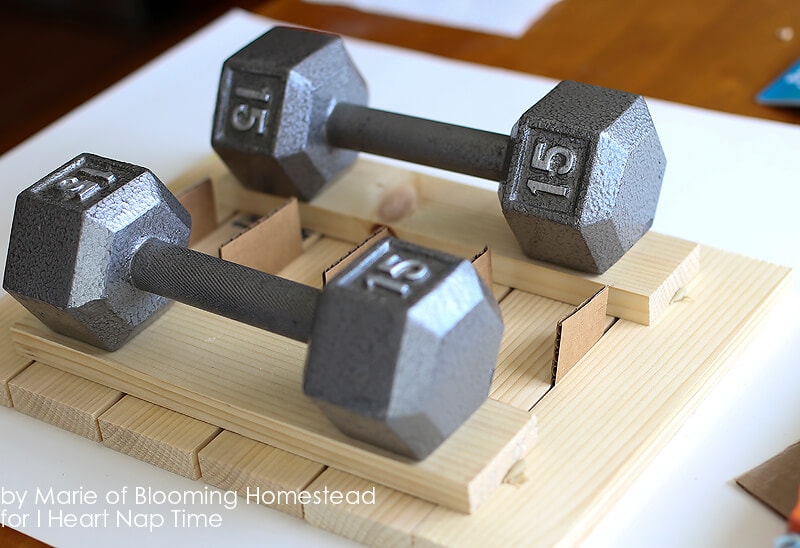
First off you’ll want to make your “pallet” wood base. You’ll get a 1×2 wood strip and cut it into lengths of 1 foot each. Next you’ll place 6 strips together with cardboard as spacers. Using liquid glue and/or nails place two strips on both sides (on back). I used weights to hold it down as the glue dried then I added nails. Now you can stain your wood and be prepped for painting.
Now you can either stencil or freehand on the “be thankful” to the wood. I chose to cut out a stencil using my silhouette with self-adhesive vinyl. If you cut out your stencil with vinyl, use transfer backing to adhere stencil to the wood.
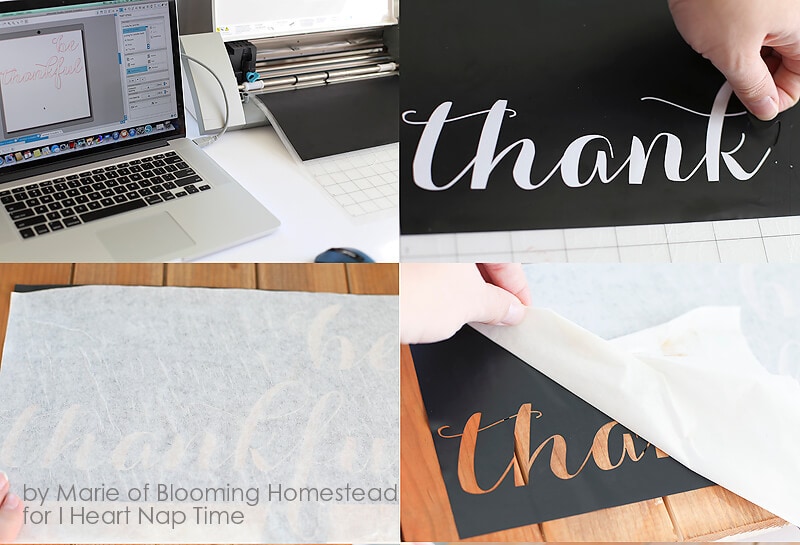
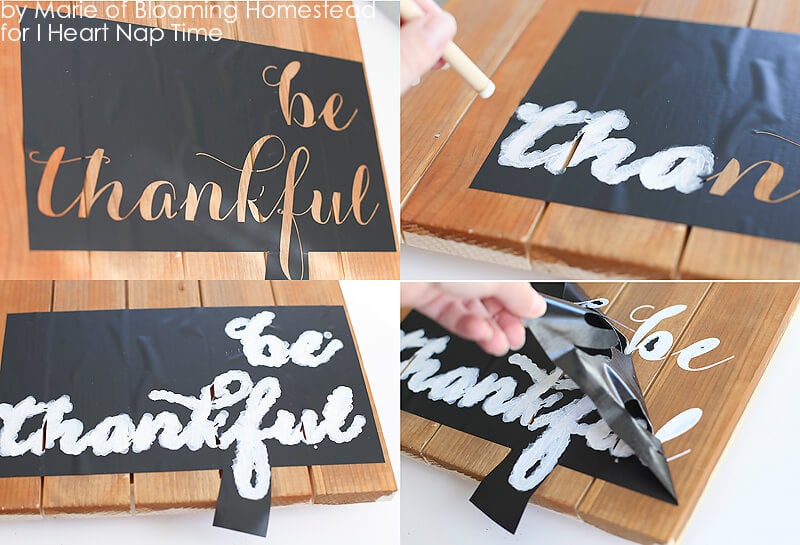
Press down the vinyl to make sure that there is minimal paint bleeding. I use a paint dauber and lightly pat the paint over the stencil. When you get it all painted you’ll be ready remove the stencil.
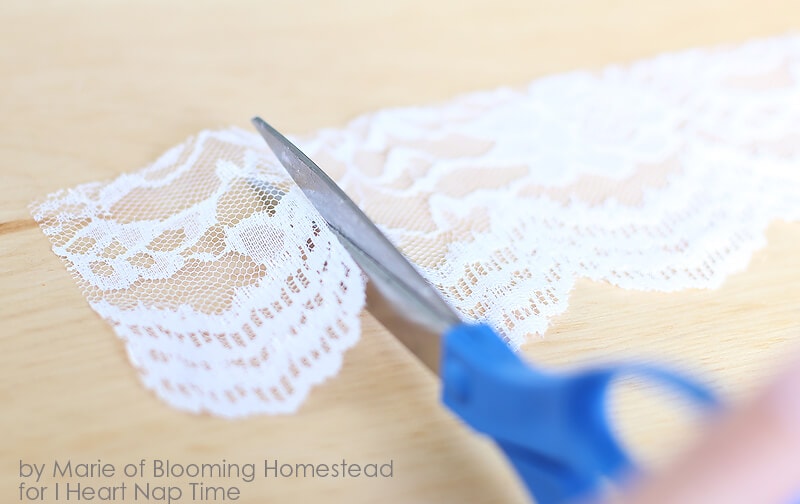
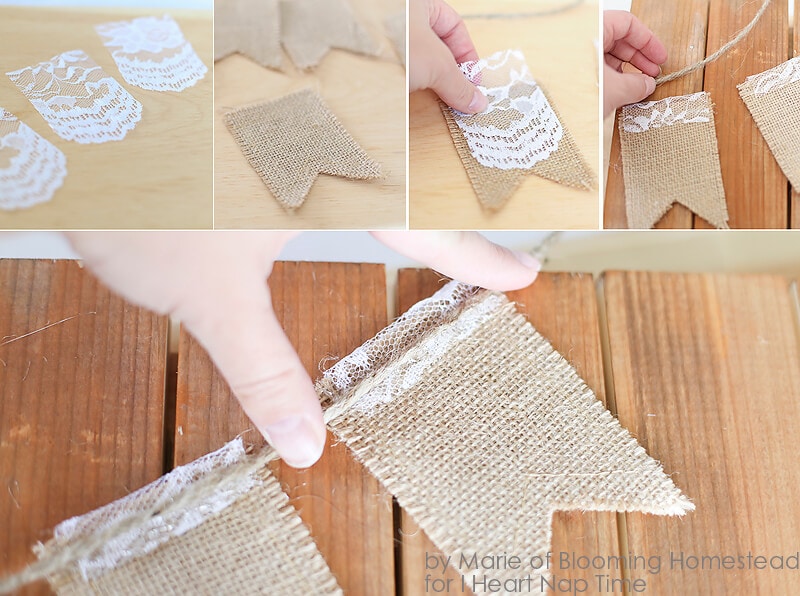
Now you can make the cute burlap lace banner to finish off the look. Cut the burlap into pennant shapes (I purchased mine pre-cut with the edges sewn from the craft store.) Now you cut strips of lace to fit over the banner. I love this scalloped lace and it added such fun detail.
Now you can overlap the lace over the burlap and hot glue it to jute to complete the banner.
And now you have a beautiful message for your home.

I’d love for you stop by Blooming Homestead and check out some of my other projects.


This has been added to the top of my list of things to do. It’s gorgeous and simple but classy! Great tutorial. Thanks!!
Sharon
So glad you like it Sharon! Thanks for your comment! 🙂
Very cute! I’ve never painted on wood and was wondering if you got a special paint to use? Or would any paint pretty much work? Thanks in advance!
I just used regular acrylic paint from the craft store and it worked well. I think almost any paint would work and you could seal it after to make sure. 🙂
Burlap and lace and a little banner…I couldn’t think of a more perfect combo! Love what Marie puts together!! 🙂 Thanks for sharing with us! 🙂
Thanks so much Amber!
Love this. I’ve never seen the cardboard spacer trick before. What did you use to seal your sign?
I actually didn’t seal this sign yet, but usually I just use some spray poly from home depot.
I now have plans to head out tomorrow and pick up these supplies! Such a fantastic project…thanks for sharing!
Have fun making this beautiful sign! You’ll have to let us know how it goes! 🙂
I bet it will turn out great!
So lovely!! I love the burlap and lace…and most of all the message! Would love for you to share it at our link up party tomorrow please (Thursdays). 🙂 Hope your week is great!
Thanks so much Kendra!
What is the font name, or is it a design from the Silhouette store? Love!
I loved this project! So easy to make and it turned out beautiful!! What font did you use? Thanks for sharing! 🙂
Hi Patty, thanks so much. I used a font I just purchased last month called Carolyna. I have never purchased a font before…but once I saw this I knew I Just had to!
Love it! What font did you use?
I’ve made my sign up but can decide on a font to us and was wondering what you went with. Thank you for such an adorable idea.
I love this so much I featured it today over at YDTT! Stop on over to see your feature and grab a button! xo http://www.brepurposed.com/2014/10/27/designs-time-33/
Marie – this project turned out beautiful! I love both the sign and the banner you made! Thanks so much for sharing it over at The Makers link party, you are being featured this week 🙂
~Katie
Gorgeous, I love the lace and burlap contrasting together! x
This is the perfect addition to my entryway! Thanks for sharing!
This is by far my favorite fall project! Pinned!!
Wood paintings are my favorite!! This one is perfect for the holidays! Such an adorable touch in any Fall inspired home!