Unique DIY Master Bedroom Art
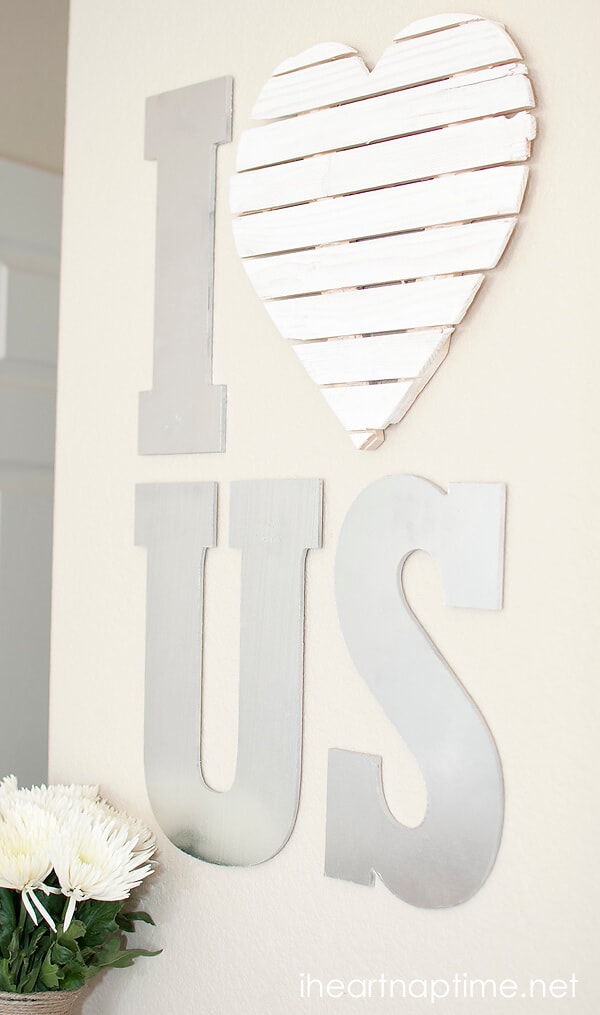
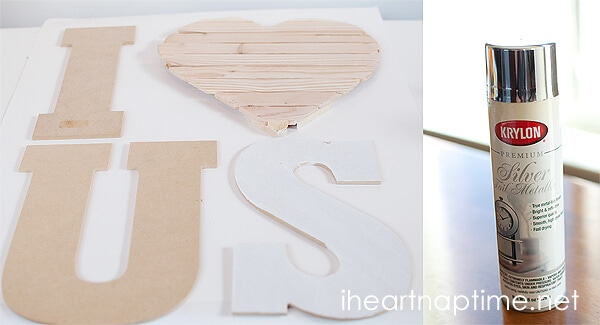
Hello, I am Marie from Blooming Homestead and since we are in the midst of a master bedroom makeover I thought I would share this fun, unique DIY master bedroom art. I love incorporating reflective items such as metallic and mirrors with naturals such as burlap and jute, and I wanted to create something unique for our space. I purchased some 12” tall mdf letters and went to work on a creating a heart out of wood strips. I am gal that doesn’t have all kinds of tools or a husband “willing” to jump in and do my dirty work…lol, so when I decide on a project I always make sure it is something 1) I can complete by myself and 2) doable with the tools I currently own. This project met the challenge!
Supplies:
- 5 lattice strips cut into 3rds (may need more or less depending on size of heart you make)
- liquid nails or nail gun
- cardboard spacers
- paper heart to use as template
- paint & brush (white craft paint and metallic spray paint)
- MDF letters (I used 12″ tall letters)
- jigsaw & sander or sandpaper

1. Using my jigsaw I cut lattice strips into 3rds.
2. Line up cut strips and layout. (save 2 strips to use as backing)

3. Add spacers in between each strip. (I used cardboard strips cut from a box)
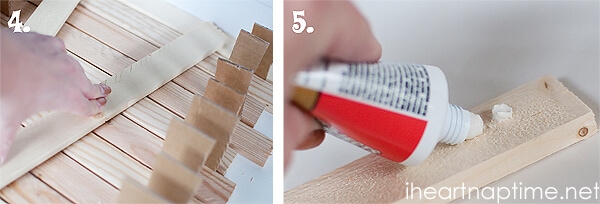
4. Use the 2 strips you saved to bind all the spaced strips together. I used a “V” shape so that when I cut it into a heart each strip would be supported.
5. Now it’s time to attach the backing strips. You can easily nail them together, but if you’re like me and don’t have a nail gun you can use liquid nails. I just attached it to the back of the strips and pressed it down to adhere it.
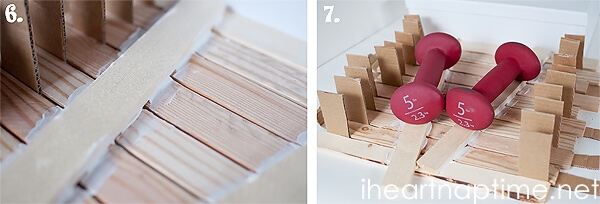
6. Next I brushed some extra glue around the spaced strips to make sure it would be secure.
7. After you have it glued, you can use something heavy to help hold the strips down while they dry.
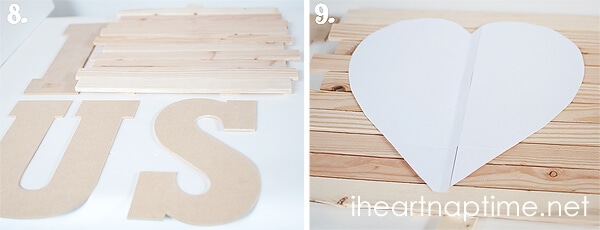
8. After the liquid nails dried completely, I took my mdf letters and lined up my “art” so I knew what size of heart to cut out.
9. I cut a paper heart template for accurate sizing.

10. Trace around the paper heart onto the wood so you know where to make your cut. Now you’re ready to cut! (I used my jigsaw) After I cut out the wood heart, I used my sander to sand the edges and smooth it down a bit to get it ready to paint.
For the heart, I decided to do a “white wash” technique which is basically watered down paint that allows the wood grain to show through.

For my MDF letters, I used a metallic spray paint that looked great applied although it was hard to photograph because of how well it reflected!
And here’s the final product!
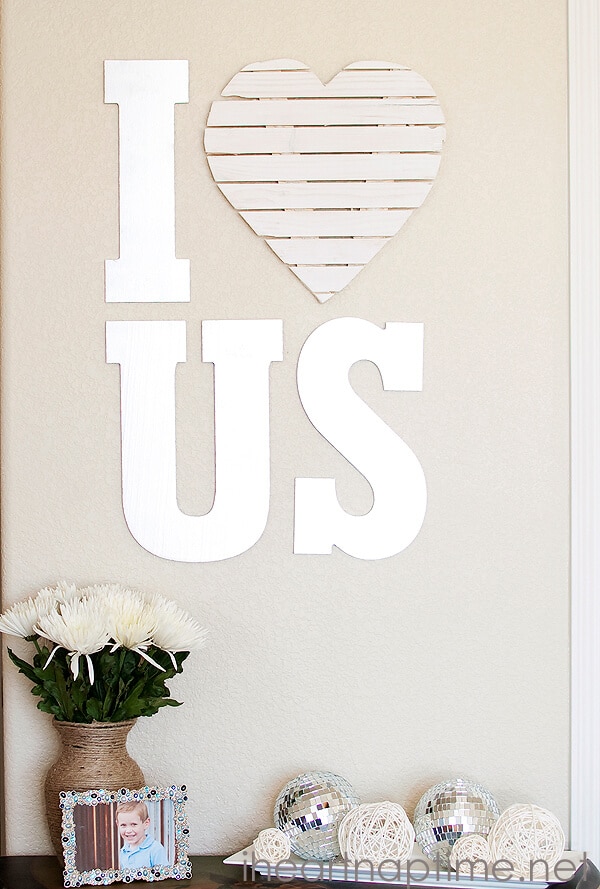
Close-up of the details (notice the cool metallic finish!)


Hello! I have a passion for all things crafty, this includes home decorating, organization, digital design, DIY, and cooking yummy comfort food!. I love sharing my tutorials and projects in hopes that I can inspire others. When I am not crafting, I like to read, shop, watch movies, and visit with family & friends. Most importantly, I love spending time with my husband of 11 years and our little boy who is growing up way too fast. You can find me at Blooming Homestead.

Very nice. I would like to be able to do something like this, but it seems that is a lot of work involved. Or maybe I am just too laizy :))
Oh my! That is awesome! I may have to do this in our bedroom!
So wonderful! Love wood, and could definitly use this technic for other purpose. Love the heart shape, looking SO good 🙂 thank you both for sharing and have nice day
I am in love with this!
Awesome!! That would love great in our bedroom. I’ve been looking for some decorations to spice it up. This is great! Weekend project 🙂
This is beautiful! It’s so unique and yet simple looking.
Oh I love this! It would be a great gift for Valentine’s Day! (Added to the gift he really wants and some sweets of course!) Thank you so much!
This is such a cool project. That heart just made me think of a place I could use this sign 🙂 Pinned to the Better HOmes and Garden home project board. Super cute!
Thanks Jessica! 😀
Did you attach this directly to your wall or is it on something else?
This is wonderful! I’m wondering how did you attach them to the wall? I’m thinking 3M strips for mine but was curious what you used. Very creative & awesome idea & well executed – thanks so much!
I love this idea I’m going to do it for my daughter and son n law