DIY Button Letter
Thanks for stopping by! Make sure to subscribe or join us on facebook to get our newest posts.
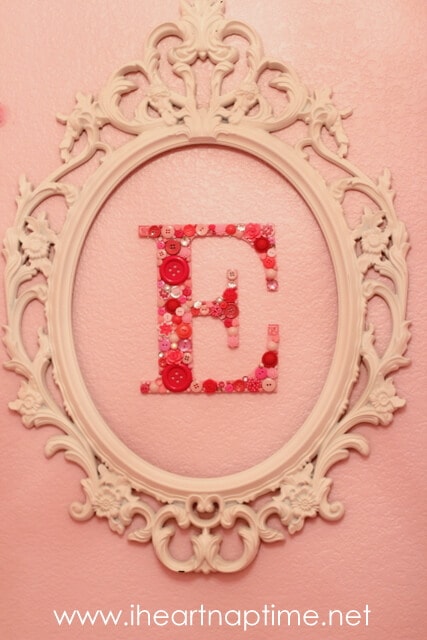
Hey friends! Happy Tuesday! Today I’m going to share with you this button letter I made for my daughter nursery awhile back. Sorry these pic’s aren’t the greatest, I actually took them about six months ago. Some how I forgot to post this. I still cannot believe I haven’t posted her nursery yet. It is by far my favorite room in my house… I’m on it!

This button letter was so easy to make. All you need to get started is a plain wooden letter. You can find these at any craft store. Then you’ll paint it to match your color scheme. I’ve seen some cute multi-colored button letters as well. There so many different variations you could do. Great creative!

Emmalyn’s button letter E had to be all pink {of course} to match her girly room.
Button letter how to:
- Gather several different buttons in all shapes and sizes. I spray painted several buttons to make them pink. 🙂
- Arrange your buttons on your letter before gluing.
- Once you’ve laid all your buttons down you can start gluing. Start with your bigger buttons first.
- Once all your buttons are glued on, you can fill in the empty spaces with rhinestones and brads.
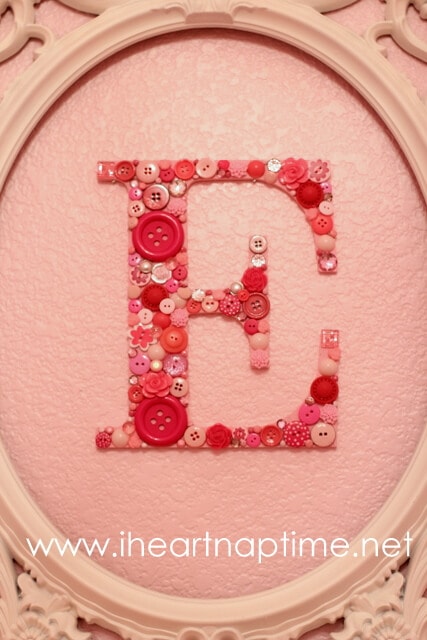
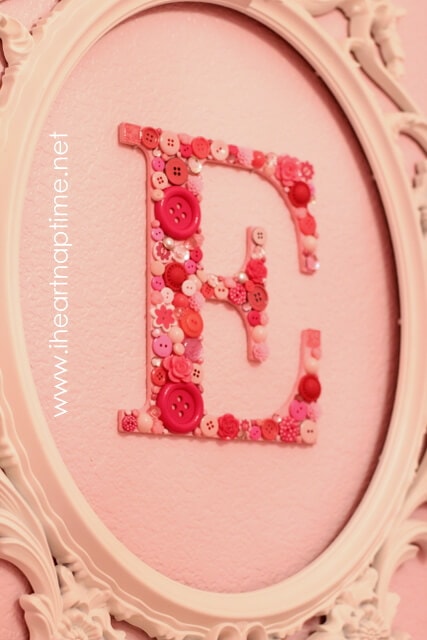
I hung up the E inside this funky frame from Ikea. I love how it turned out! I’ve recently added some butterfly’s around the sides and cannot wait to show you. It looks so cute!
Thanks for reading! Have a great day! {hugs}


What a great idea! I wish I had thought of this while I still had a three-generation button box (that now belongs to my daughter – making it a four-generation button box, I guess)
That is just adorable! I have a similar frame that I have been trying to figure out what to do with it-you just solved my problem 🙂
Thanks!
Meegan
what kind of glue did you use? this looks neat!
thanks for sharing! 🙂
Hey Jean! is started out with E-6000 but ended up going with hot glue! 🙂
I am definitely pinning this as a project I want to do. I just love the buttons. Great idea to paint some of them.
Me encanta.Precioso.Bsos.
I think this is so adorable! What a cute and fun project! I am going to do something a little more masculine or gender neutral for my youngest boy in his room but this idea is going to stick with me. Love it!
Just pinned this! My older two have their names up on the walls of their rooms, but the little one (3 months) doesn’t have hers up yet. There appears to be some sort of letter shortage and one of the three letters in her name is always out of stock when I go to the crafts store! I bet I could pull this one off with just one letter, thank you.
That is such an adorable idea! Love the button letter! 🙂
xoxo,
Vanessa
That is freaking ADORABLE. Consider it pinned. In the *fingers crossed* chance that I one day have a baby girl, I’m making this!! I guess I could do it for a boy too but…girl seems more fitting.
I absolutely love this. I have big wall in my daughters room I was thinking of doing her whole name. Would it be too much to do a whole name in buttons? Would it cost me $10,000? How much to buttons cost these days? Admission: I’m not much of a crafter. Am I still allowed to read this and make comments?
haha love it! you are totally allowed. 😉 And yes it may cost a fortune to do the whole name. I bought a huge bags of multi colored buttons and spray painted a lot of them which made it cheaper. However I did have a few buttons on there that were .50-1 each. It ended up costing me around $20. Thanks for commenting, you’re too sweet! xo
I love it! You can always buy a package of bulk buttons at Michael’s. I bought a large bag of assorted buttons for $5.99, and it would work out perfectly for this.
Soooo sooo pretty! Girl’s nursery rooms are so fun to decorate! I’m going to have to go to Ikea now to find one of those frames.
I love how it turned out! I especially like the sweet pink button assortment 🙂
What is the Pick Me Up pen you are using and where can I get one?
Hey Monica! You can find it on Amazon or at your local craft and fabric store. I LOVE it!!
Thanks for linking to Take-A-Look Tuesday – you were featured today!
Mandy, http://www.SugarBeeCrafts.com
What a great idea! Found your site via facebook!
Thanks Sara! So glad you found us! Have a great weekend! Xo
WOW !! Awesome Ideas ~ thank you
Love this! It is so cute! Which craft store did you get your letter from? I have tried Joann’s and Michael’s, and have had no luck finding a large enough one. Also, approximately how big is your letter? Thanks!
I found mine at Hobby Lobby. It’s about 8 inches high. 🙂
I love this! I bought all my supplies to make it, but I want mine to look as perfect as yours! So, question: what did you do about the buttons that have the little post on the back instead of the button holes? Most of mine are that way so, obviously, they don’t lay flat on the letter. Did you somehow remove them or what? Enlighten me, please!
Hi Julie! Yes I removed them with a button shank. You can find one near the buttons at Jo-Ann’s. This allows them to lay flat. Hope that helps! 🙂
That looks lovely. what size letter did you use and what size picture frame please? do you know what the picture frames called from ikea. Sorry about all the question. I just love this design, one that I wanted for my little girl’s bedroom for ages I was going to buy one but they are ridiculously priced, so I’ve decided to be crafty and make one. xx
The letter is probably 8 or 9 inches and the frame is an 11×17! Here is the link for the cute frame: http://www.ikea.com/us/en/catalog/products/60232813/
Thank you.
What did you use to hang them both (letter & frame) on the wall?
Hi! I used a 3m command strip! 🙂
what glue do I use??
Hot glue works great. 🙂
I realize this post was from 3 years ago but I was wondering what kind of glue you used to glue the buttons on? Super glue or craft glue? Maybe it doesn’t even matter, I don’t know. Thanks!
This is adorable! I’ve linked to this project in my latest blog post – DIY Gift Ideas. Thank you!
Go right ahead! 🙂
This is gorgeously adorable!! I know you posted a couple yrs ago…just saw it